
yuvaranjani
Author
Published on : Feb 2, 2017
Category : General
namespace UnitTestPractice.UnitTest
{
  public class UnitTest1
  {
    [Fact]
    public void TestMethod1()
    {
      Assert.Equal(3, Add(2, 1));
    }

    private int Add(int a, int b)
    {
      return a + b;
    }
  }
}
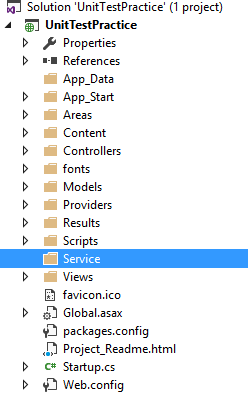
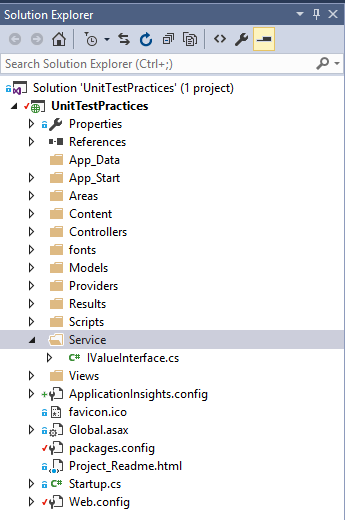
 Here, we have written a unit test for ValuesController. For that we have to create a Service for ValuesController. Right click web application Add ->New Folder, and name it as “Service”.
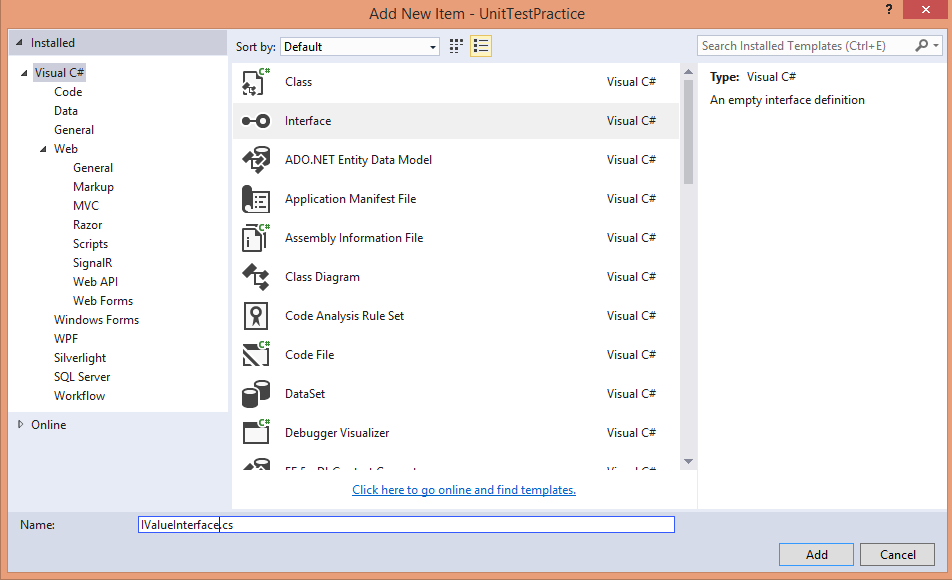
Right click the Service Folder; Add->Class->Interface
Right click the Service Folder; Add->Class->Interface
 Next, we will create the class Service and implement the methods in the IValuableInterface.
using System.Collections.Generic;

namespace UnitTestPractice.Service
  {
    public interface IValueService
    {
      IEnumerable<string>GetAllValues();
string GetAllValue(int id);
    }

  public class Service : IValueService
  {
    public IEnumerable<string>GetAllValues()
    {
      return new string[] { "value1", "value2" };
    }
    public string GetAllValue(int id)
    {
      return "value";
    }
  }
}
The ValuesController will be like this –
using System.Collections.Generic;
using System.Web.Http;
using UnitTestPractice.Service;

namespace UnitTestPractice.Controllers
  {
  public class ValuesController : ApiController
    {
      private readonly IValueService _valueservice;

      public ValuesController(IValuableService valueservice)
      {
        this._valueservice = valueservice;
      }

      public IEnumerable<string>Get()
      {
        return this._valueservice.GetAllValues();
      }

      public string Get(int id)
      {
        return this._valueservice.GetAllValue(id);
      }
   }
}
In this ValuesController, we created a Private object for the IValuableInterface and using that object to call the methods in the Service class.
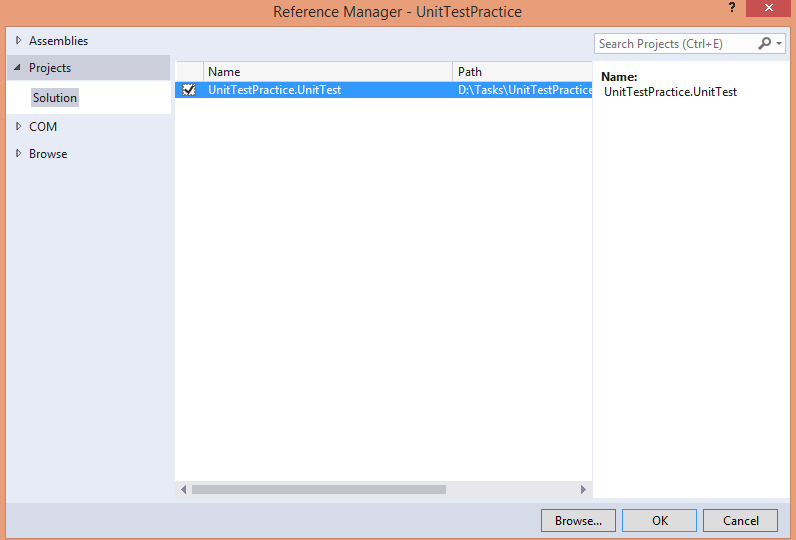
Next, we have to add the reference for the Unit Test Project. Right-click Web Application, Add->Reference. Refer to the unit test project.
 In the UnitTest class we have written the Test Methods for ValuesController,
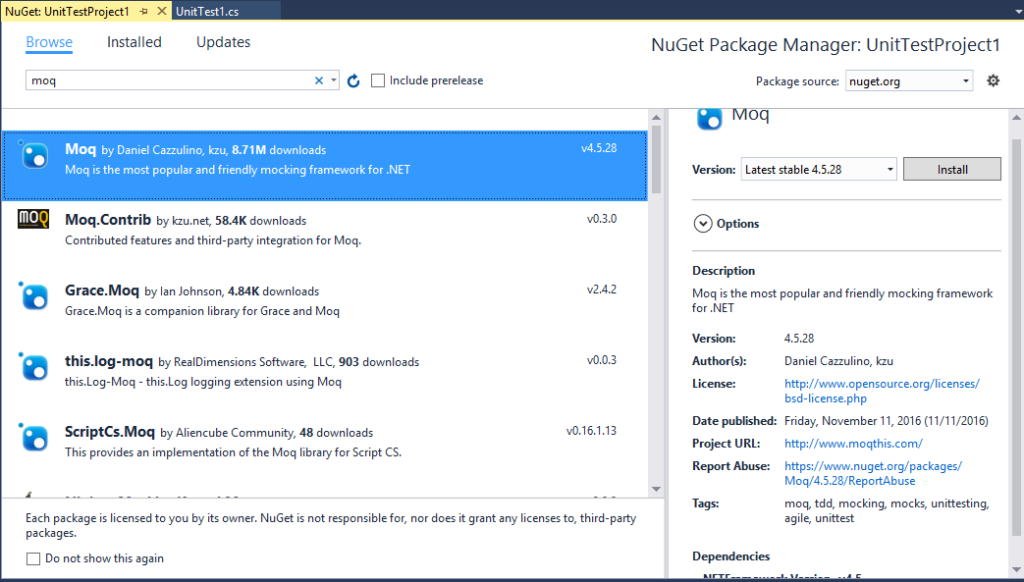
using Moq;
using System.Linq;
using UnitTestPractice.Controllers;
using UnitTestPractice.Service;
using Xunit;

namespace UnitTestPractice.UnitTest
{
  public class UnitTest1
  {
    [Fact]
    public void TestMethod1()
      {
        var valueServiceMock = new Mock<IValuableService>();
        valueServiceMock.Setup(service => service.GetAllValues())
.Returns(new[] { "value1", "value2" });
        var controller = new ValuesController(valueServiceMock.Object);
        var values = controller.Get();
        var results = values.ToArray();
        Assert.Equal(2, results.Length);
        Assert.Equal("value1", results[0]);
        Assert.Equal("value2", results[1]);
      }

     [Fact]
     public void TestMethod2()
     {
       var valueServiceMock = new Mock<IValuableService>();
       valueServiceMock.Setup(service => service.GetAllValue(1))
.Returns("value");
       ValuesController controller = new ValuesController(valueServiceMock.Object);
       var values = controller.Get(1);

       Assert.Equal(values, "value");
     }
  }
}
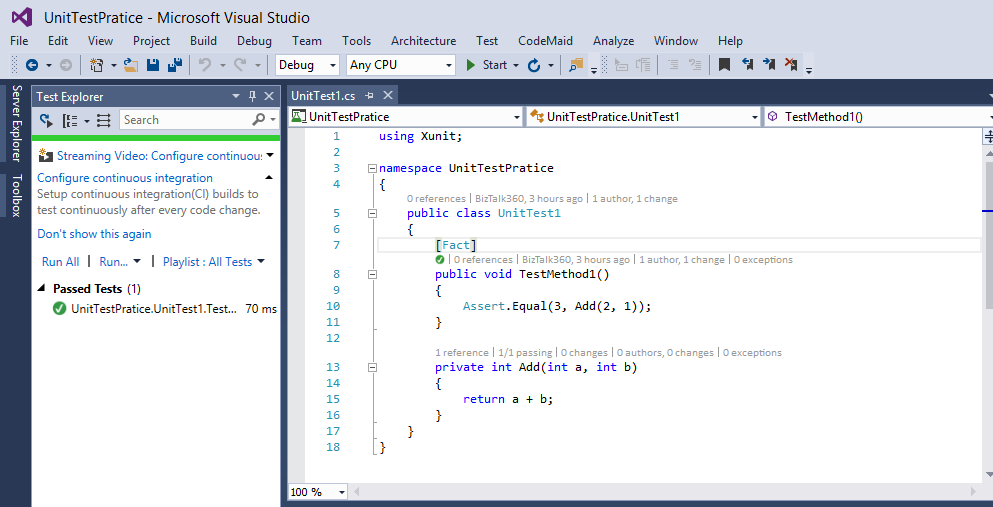
In Test Explorer, click Run All
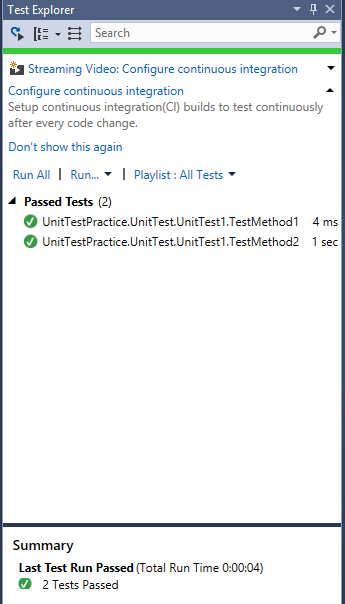 All Tests have successfully passed. In Test Explorer, you can also check the time taken to execute the tests. In our example its 4ms and 1 second. With this execution time information, developers can later decide if performance tuning is needed.