In this blog post, we will take a recap of Episode 14 on Middleware Friday. In this episode, Kent Weare talks about how you can use
Azure API Management to protect Azure Functions. Kent was motivated to do this episode mainly due to the recently published blog posts on “
Announcing Azure Functions OpenAPI (Swagger) support preview” and “
Microsoft Releases Azure Functions Proxies Public Preview“.
In a nutshell, Azure Functions Proxies addresses the challenges that exist for developers who have a lot of APIs. Each Azure Function App will have its own hostname and the Azure Function may be hosted in multiple regions. Passing this URL management complexity down to API consumers will definitely create friction. With Azure Functions Proxies, developers can easily expose a reverse proxy endpoint and abstract underlying APIs which can include other Function Apps, APIs, Azure API Apps or other HTTP endpoints. For more details on Azure Functions Proxies, please read the
blog post on the next episode of Middleware Friday.
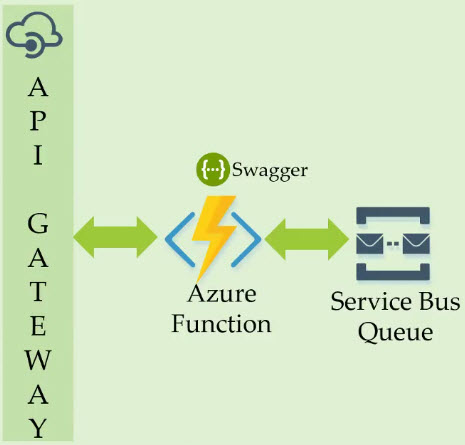
To understand the concept of using API Management to protect Azure Functions, Kent used the following scenario to explain the concepts.
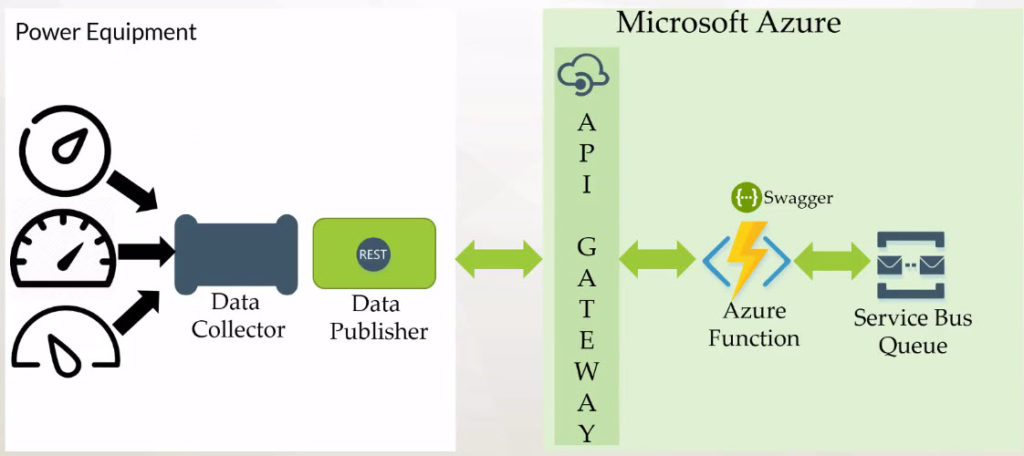
Since Kent works in the Energy sector in Alberta, Canada, he picks up his favorite area of expertise to showcase the scenario. We have a simple telemetry ingestion solution which is based on RESTful APIs. There are many devices that are emitting the telemetry data and there will be a Data Collector responsible to aggregate the data from different devices. Next, we will create the Data Publisher (based on REST) which will publish the tag reads into Azure through the API Management Gateway and then the Azure Function which will talk to Azure Service Bus Queue.
How does Azure Function use API management?
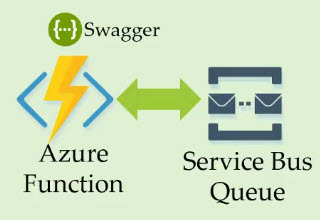
In this demo, we will generate a Swagger definition for the Azure Function and then plug the Azure Function into the API Management Gateway.
Let’s get started with the steps to get this demo working. First, we will create an Azure Function and then generate a Swagger definition to be able to pump messages into the Service Bus Queue.
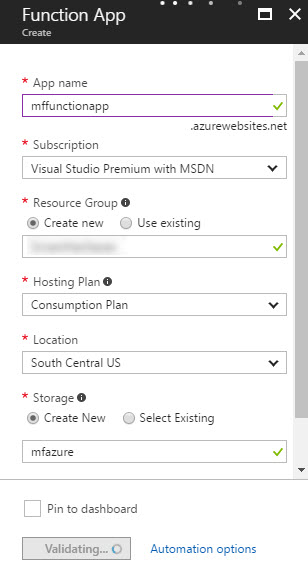
Step 1 – Create the Function App
In the first step, let’s create the Azure Function App. Azure Functions help you to process events with a serverless code architecture. For the purpose of this demo, we will create a function app with the hosting plan based on consumption.
- Log in to Azure Portal
- Click + (New) -> Compute -> Function App
- Click Create
- Enter the Function App name
- Choose your subscription, resource group, hosting plan, location
- Create your new Storage or choose an existing storage account
- Click Create to create the Azure Function App
[adrotate banner=”9″]
Step 2 – Create a new Function
In this step, we will create a new function and define the naming conventions.
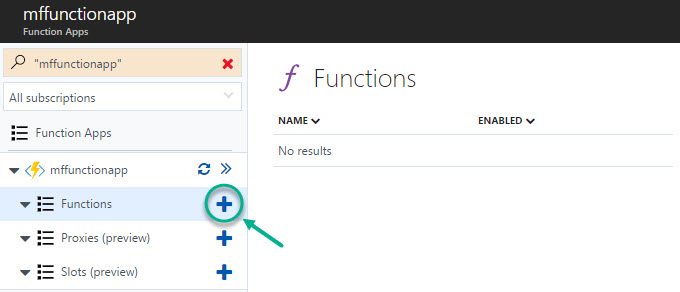
- Select App Services from the left navigation menu
- Click on the function app name that we created in the previous step
- Click the + next to Functions
- You will be presented with a Quick Start pane where you can select your preference and create the Azure Function.
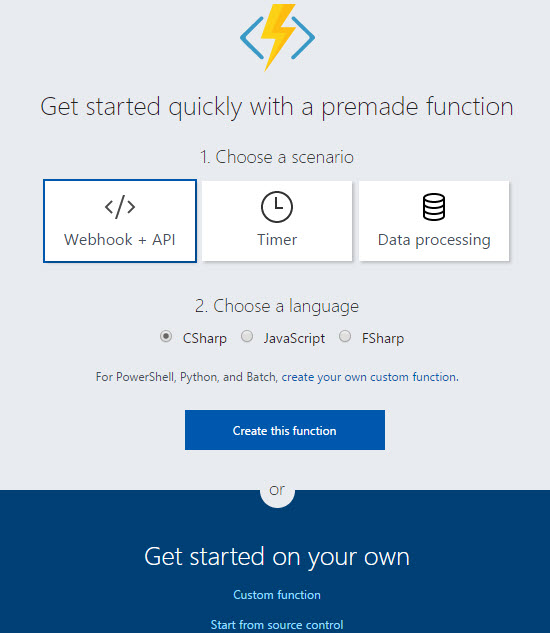 In our case, we will opt for the ‘Custom Function‘ option found in the second half of the quick start pane.
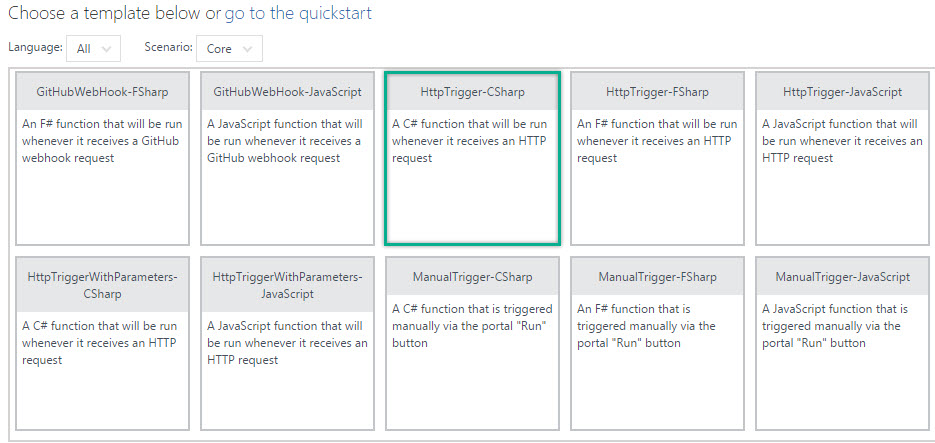
- Select HTTPTrigger-CSharp from the list
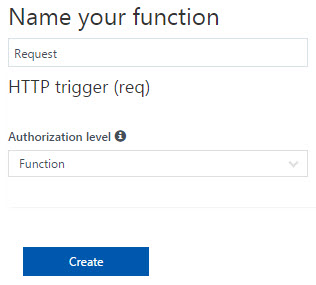
- Enter the name for the function, say, Request, set the Authorization Level to Function and click Create
- Next, under the created function in the left hand side menu, click the Integrate label. Here we need to define the Allowed HTTP Methods. We will select “Selected Methods” and let the function app expose only the “POST” HTTP Method.
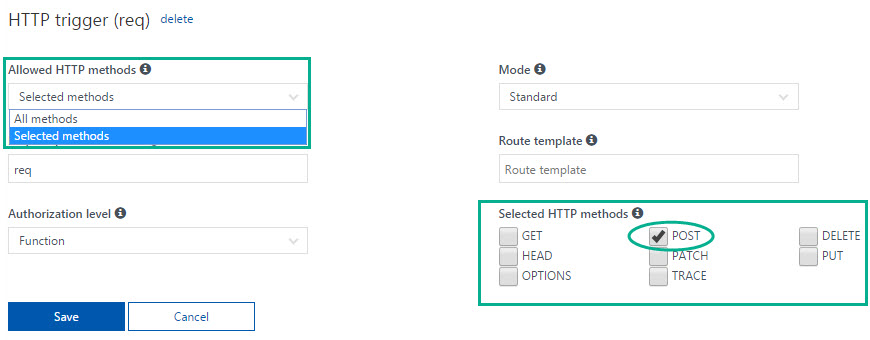
- Click Save
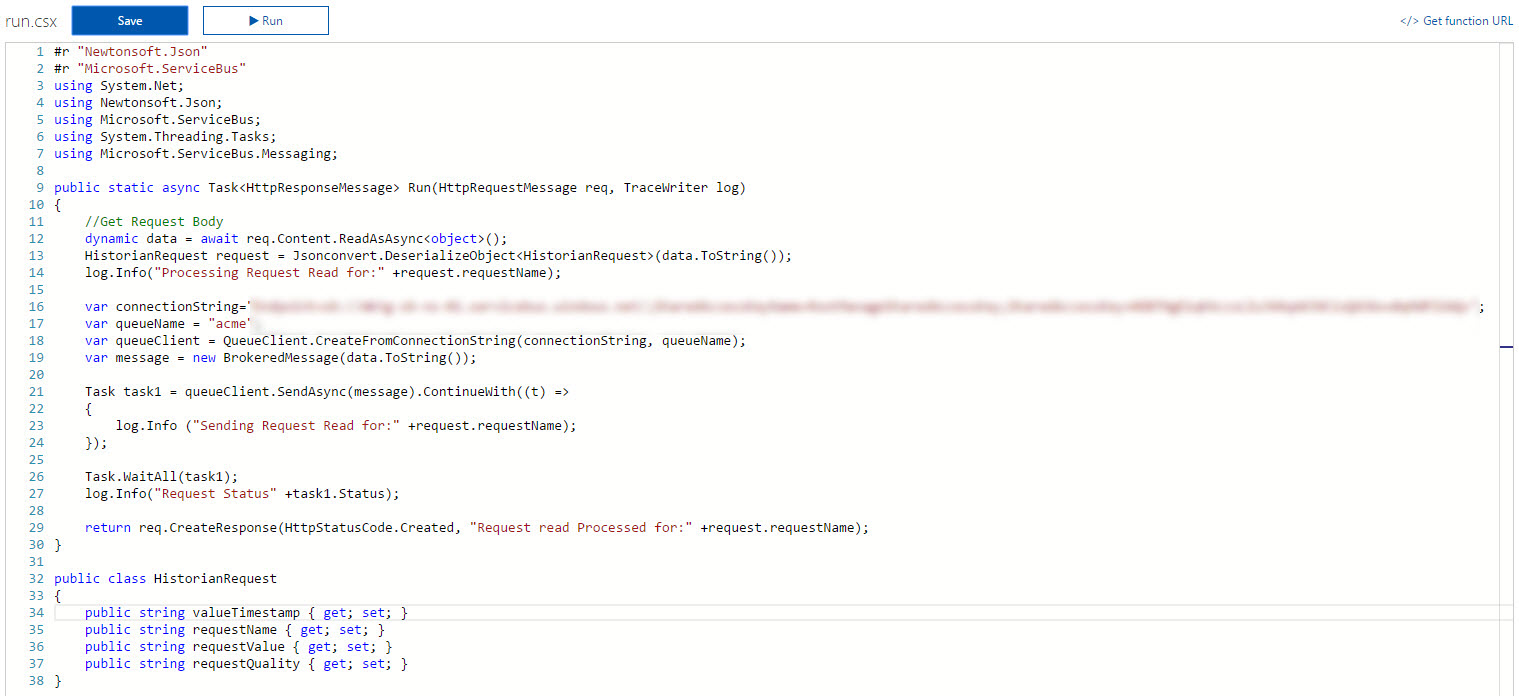
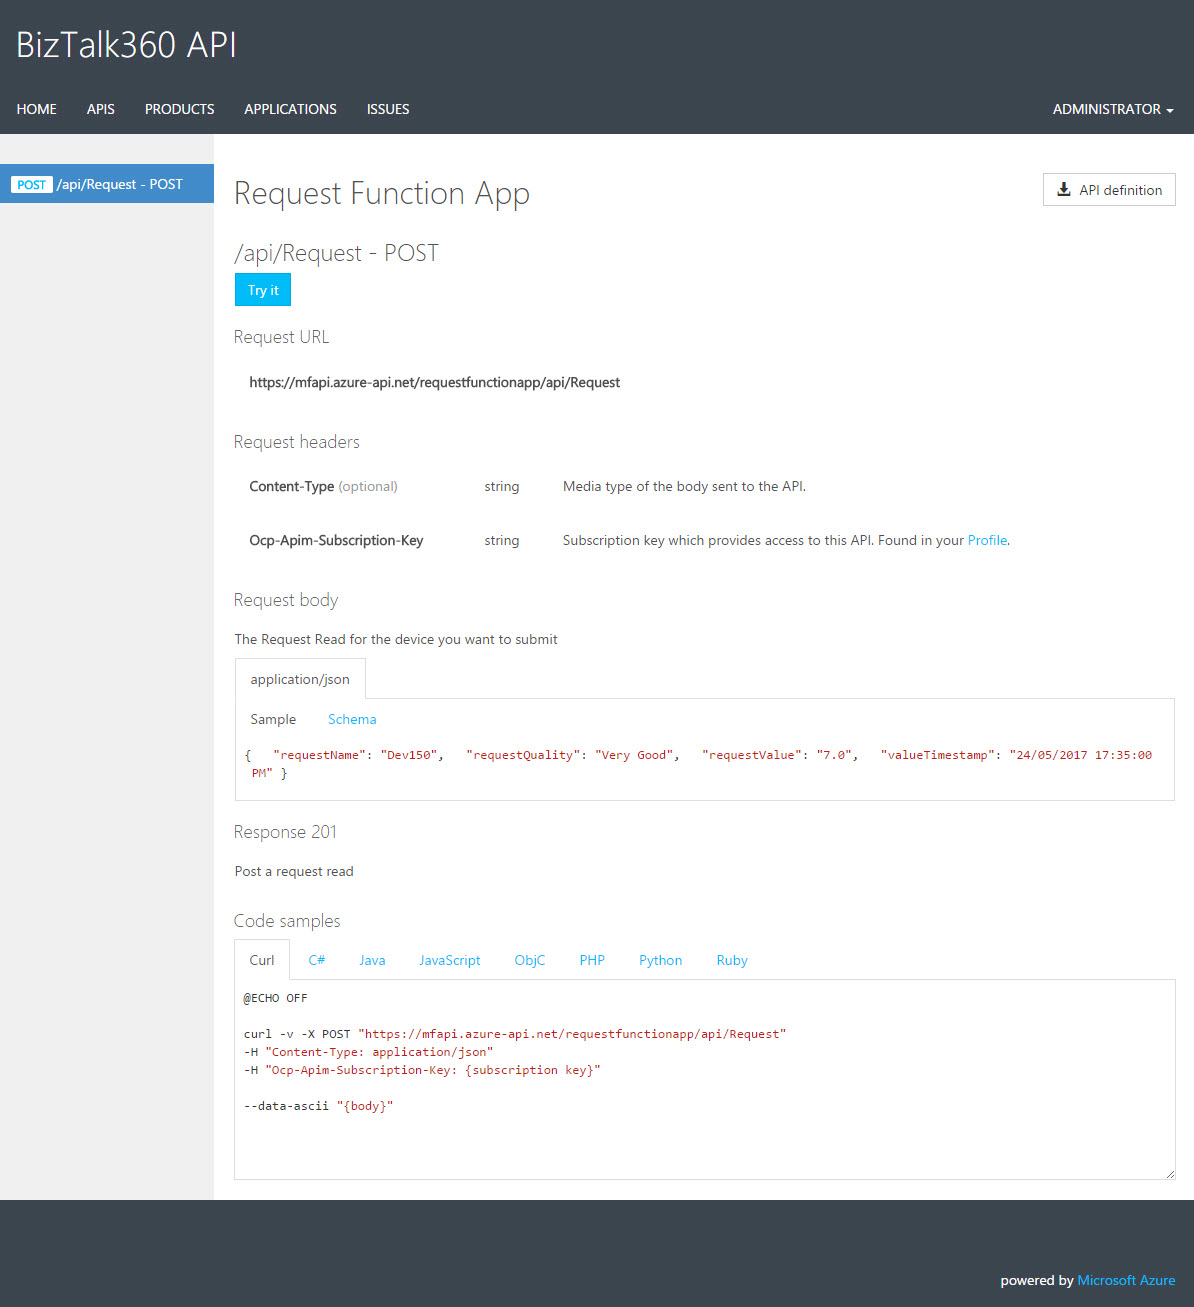
- In the Functions section on the left hand side menu, click the function that you created earlier (Request). You can now construct the code relevant to the above mentioned scenario. The code will look as follows –
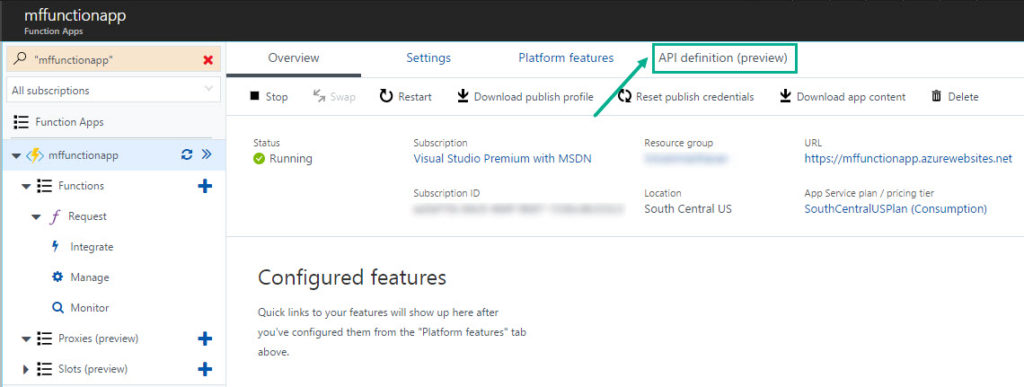
- Select API Definition (preview)
- Under the API Definition Key select the API Definition Source as Function.
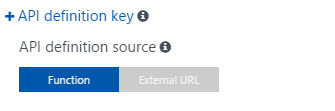
- Click Generate API Definition template. This will generate a basic skeleton for the Swagger definition for the API.
 You can edit the generated SWAGGER definition with your requirements.

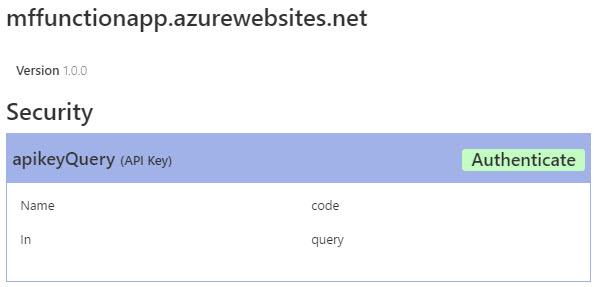
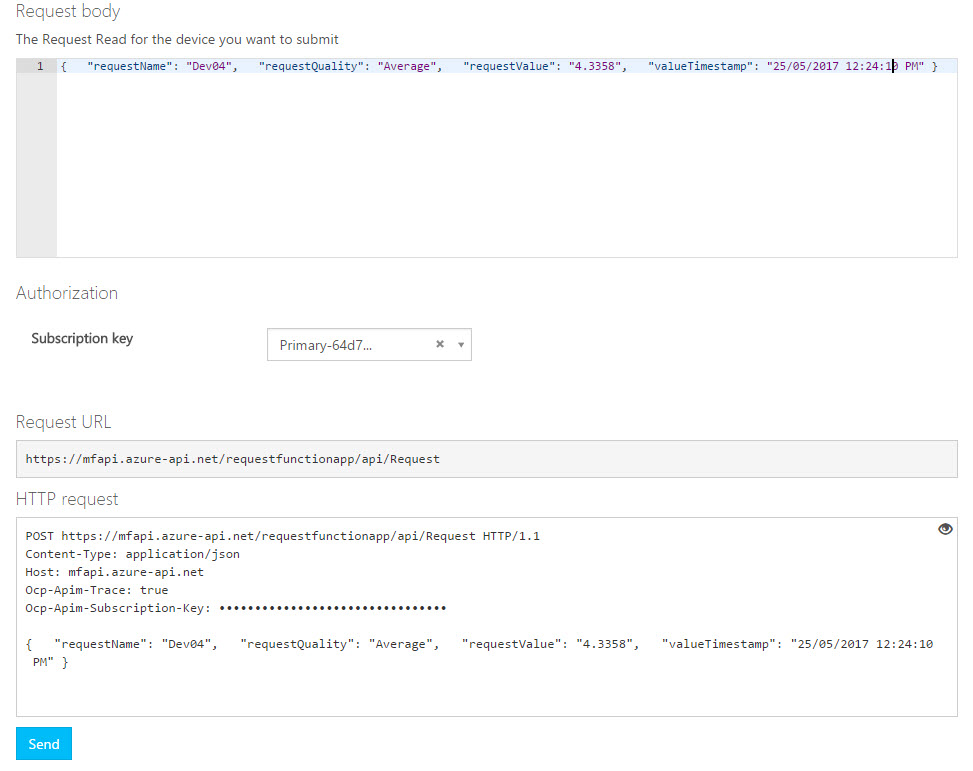
- To use the Swagger editor, the API key authentication has to be set. On the “Function API definition (Swagger)” page, on the right side, click Authenticate under the Security information.
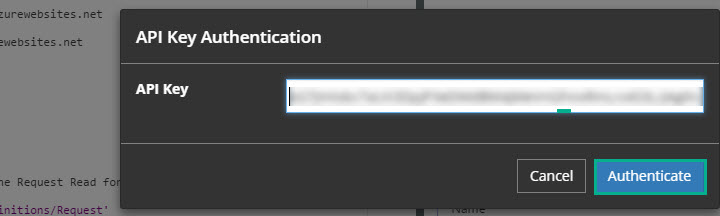
- You need to provide an API key that can be retrieved from the Manage section on the left hand menu (under Integrate). Click the”Click to Show” under Function Keys. This will display an API key. You need to copy the API key.

- Go back to the Function API definition (Swagger) section and click Authenticate. Paste the API key in the space provided. Then, click Authenticate.
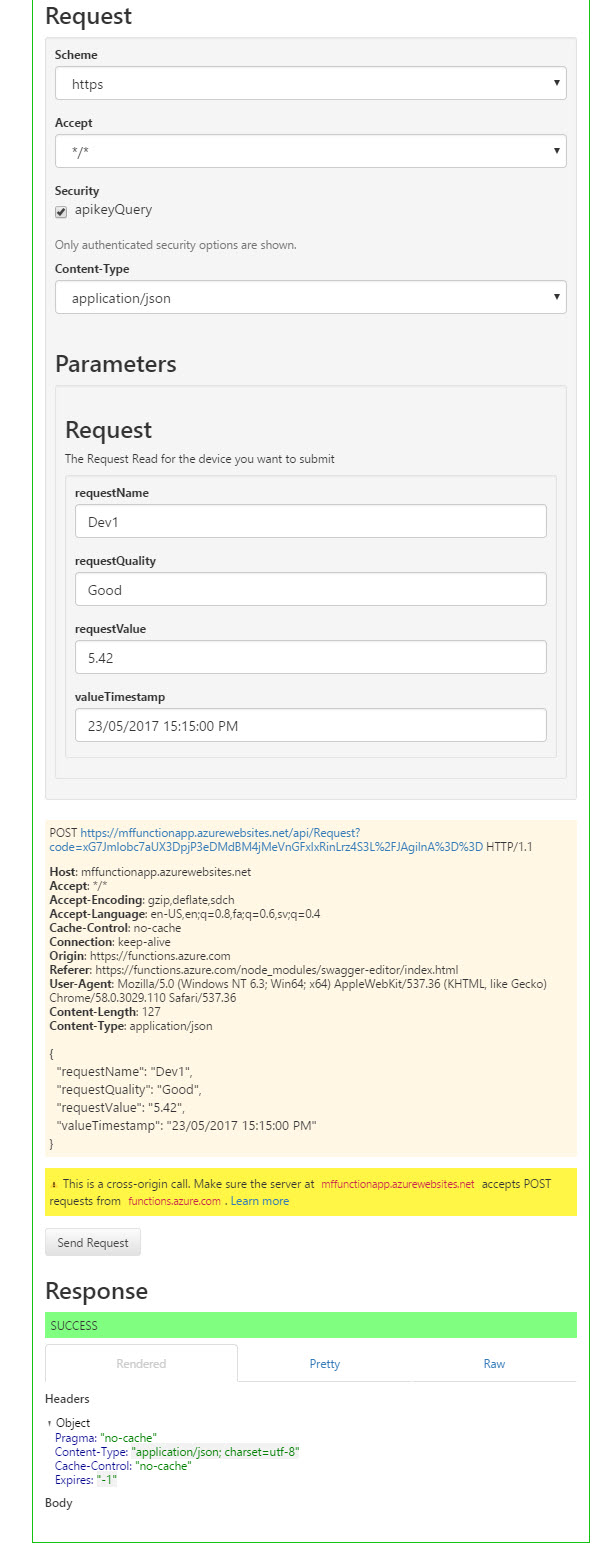
- Now that we have authenticated our API key, we can provide a sample body information in the Swagger and click Send Request.
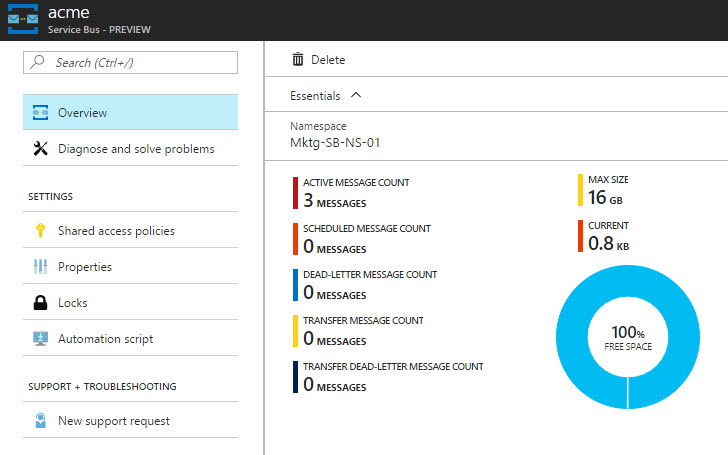
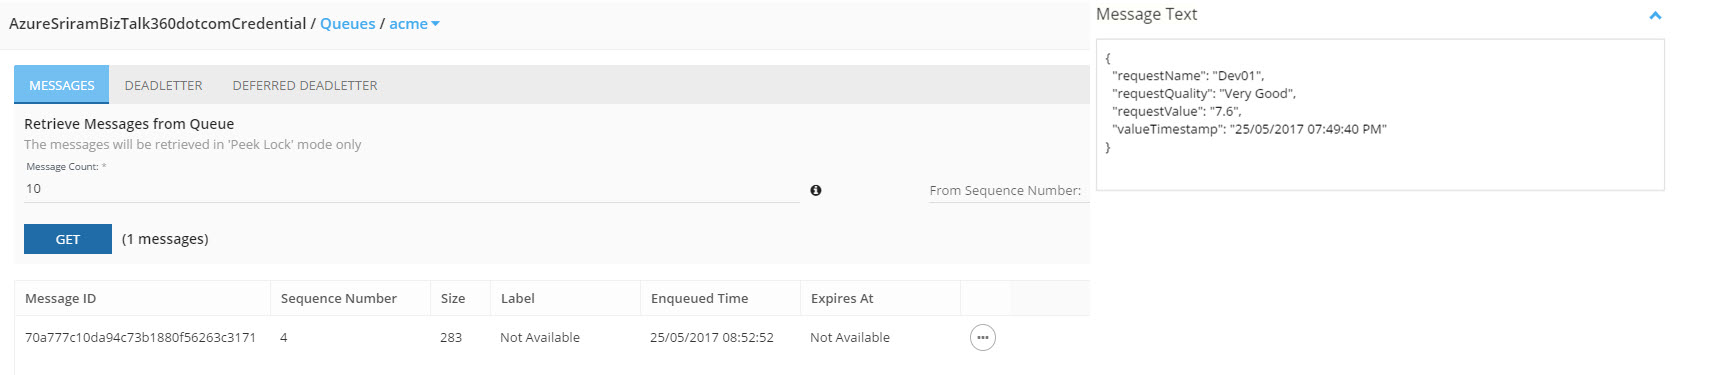
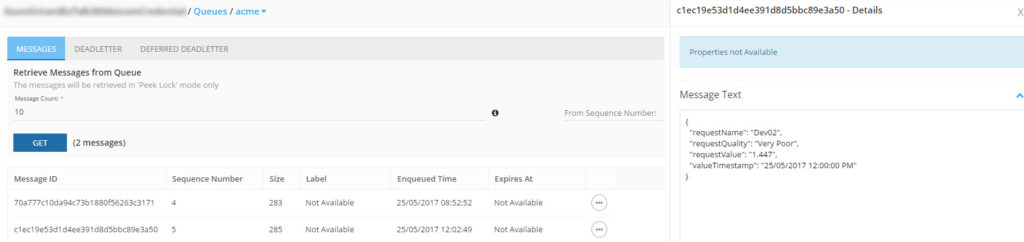
Now, let’s navigate into the Service Bus Queue “Acme” that we defined while writing the code. We should see the active message (count) showing the same value of the number of messages that we just sent from the Azure Function App.
Therefore, in this way, we can test whether our Azure Function is working as expected before we get into the API Management section of the demo.
Now, moving on to the second half of the scenario about API Management.
Step 3 – Setup the API Management
Let’s get started with configuring the API Management. The first step is to create an API Management service.
- Click New (+) -> Web + Mobile -> API Management
- Enter a name for your API Management service
- Choose the subscription, resource group, location. Additionally, provide the organization name and administrator email for use in the developer portal and email notifications.
- Choose the pricing tier and click Create to create the API Management service
[adrotate banner=”4″]
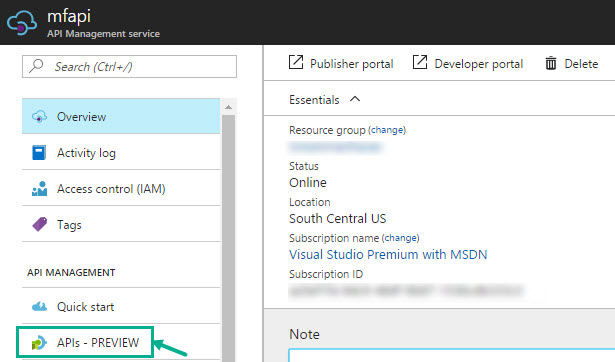
Step 4 – APIs – PREVIEW
Next step, let’s create the APIs –
- Once the API Management service is created, select APIs – PREVIEW
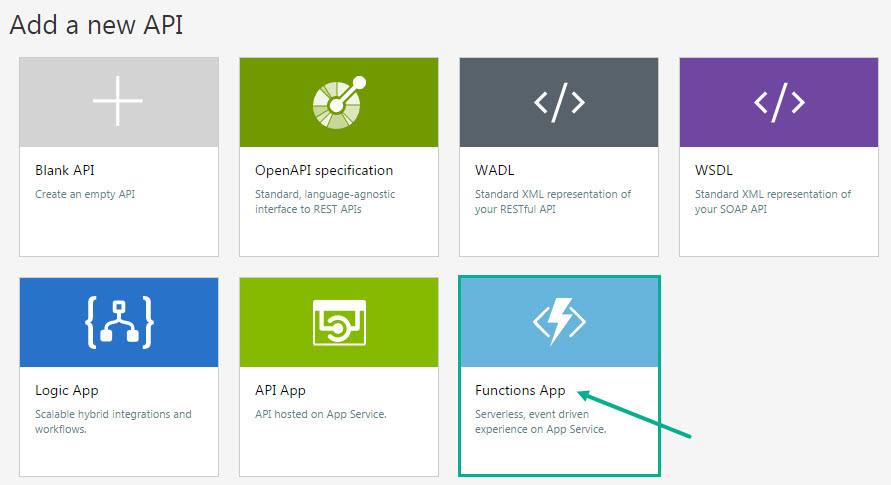
- In the demo, Kent chose the OpenAPI specification tab since the Functions App API was under development. For this blog post, we will directly call our Function App API from the API Management. Select Functions App block.
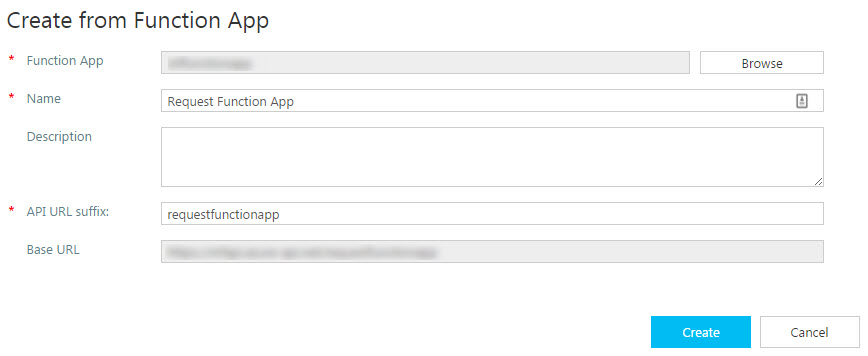
- In the Create from Function App pop-up, enter the following details –
- Click Browse to browse for your Function App that we earlier created in Step 1
- The Name will be automatically populated with the name of the function app. You can change the name to a friendly name.
- Enter a description for the Functions App
- Enter an API URL suffix that will be appended to the base URL
- Click Create
- The Function App is now available within your API Management environment. You can see the backend endpoints and some policies on the inbound and outbound processing.
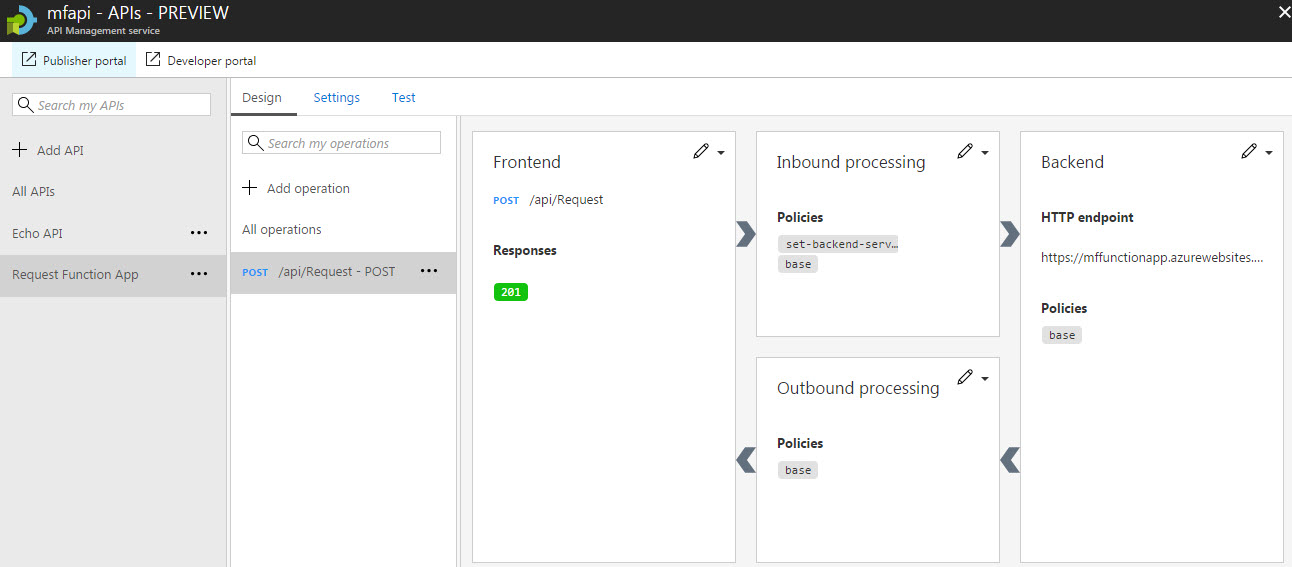
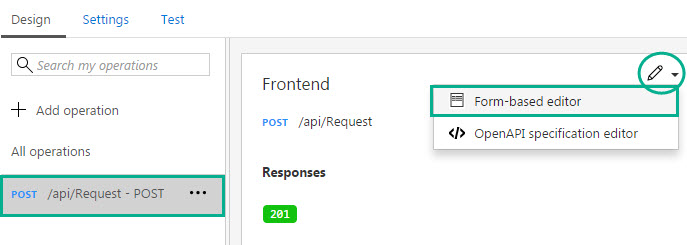
- Let’s now make some changes to the Frontend. You can click the pencil icon and select Form-based editor.
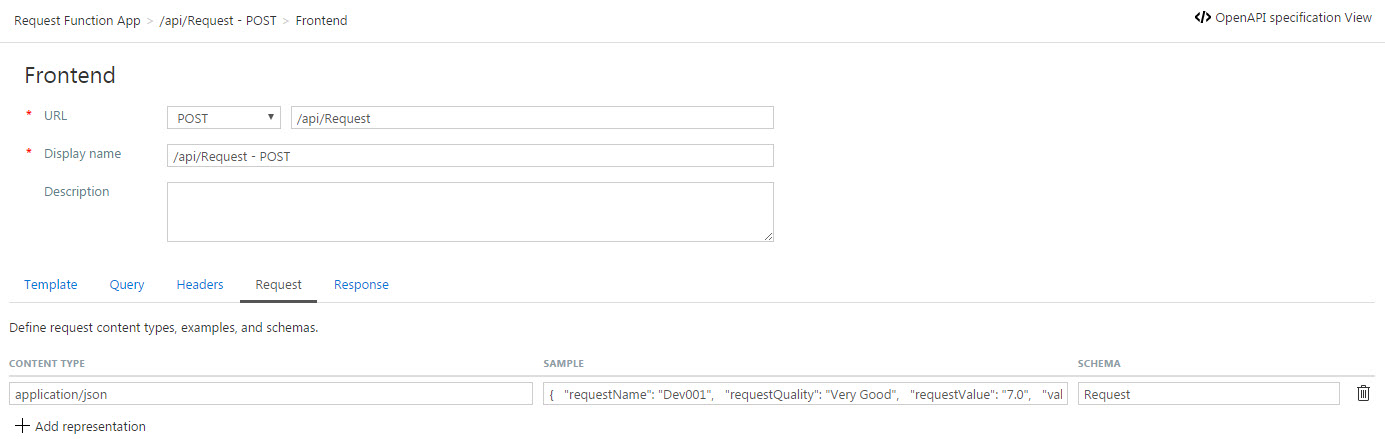
- In the form-based editor, select the Request header and provide a sample request message. You can copy the same message that we gave previously in Step 17 (refer above) in the Swagger editor in Function App portal and paste it in the sample field. Click Save to save the data so that this will be pre-populated in the developer portal.
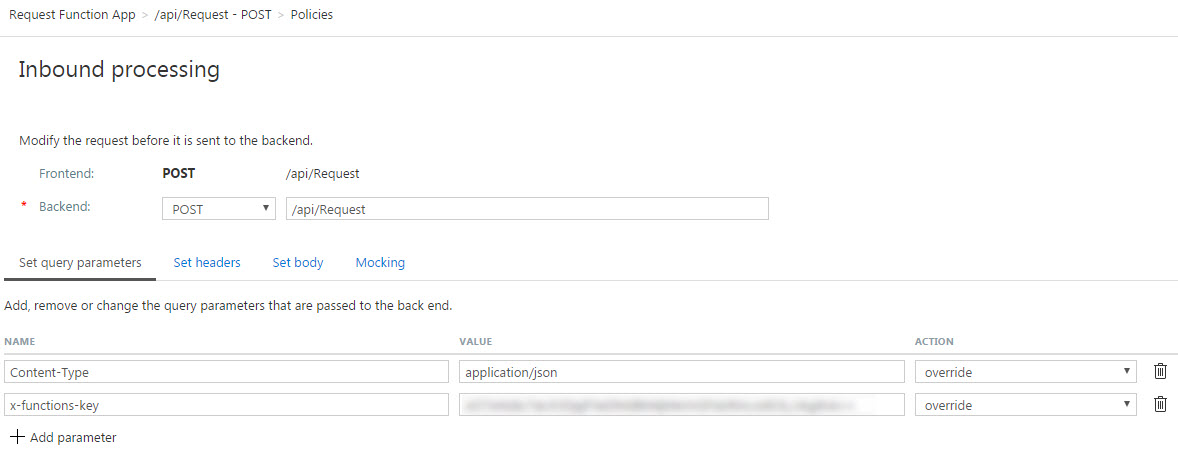
- Repeat the same step as Step 6 for the Inbound Processing process. In the form-based editor, we need to set the following query parameters:
- Content-Type – Set the value to “application/json“
- x-functions-key – Paste the key that we copied earlier in step 15 (API Function Key). If you don’t set the access key, you will see a 401 – Unauthorized access error when you try to post messages.
Now, we have our Functions App connected with the API Management. The next step is to connect our account with a Product.
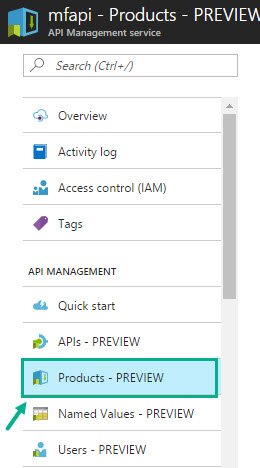
Step 5 – Products – PREVIEW
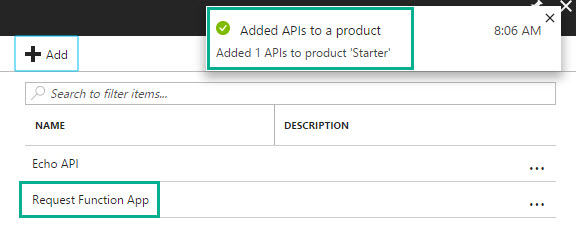
- Under the API Management Service screen (under APIs – PREVIEW), click Products – PREVIEW
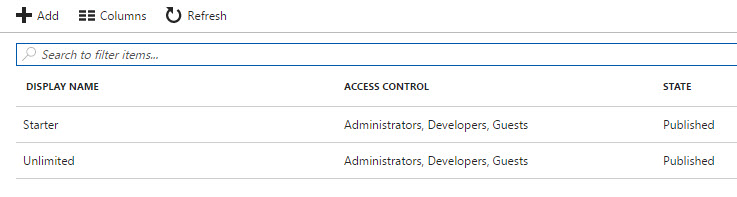
- Select a product from the available list (Starter/Unlimited), or you can create a new product. For this demo, we will select Starter.
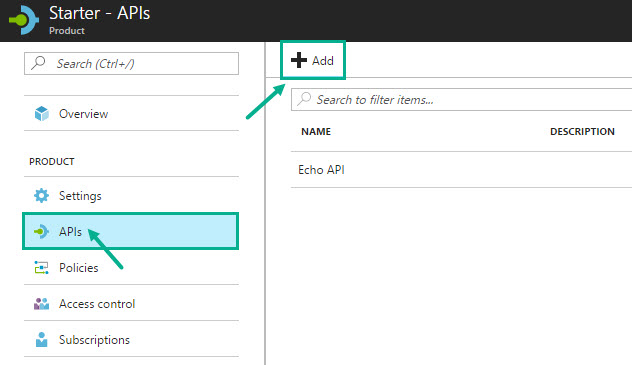
- Click APIs from the left menu and click Add to add our API
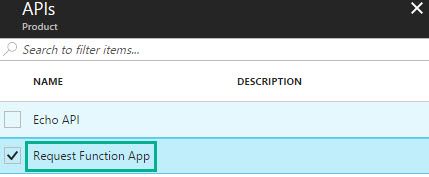
- Select the API we published in Step 4 (Request Function App) and click Select
That’s it! We have configured our Azure Function to be protected by API Management. We can also add other policies if required. We have also associated our API with an API Product which will then allow our account to call our API.
Now let’s see how the Request messages from the Azure Function will be published into the Service Bus Queue. For the purpose of this demo, we will use
Turbo360 (Formerly known as Serverless360) – a One Platform Operations, Monitoring and Analytics software for Azure Service Bus to view the messages in Service Bus Queue.
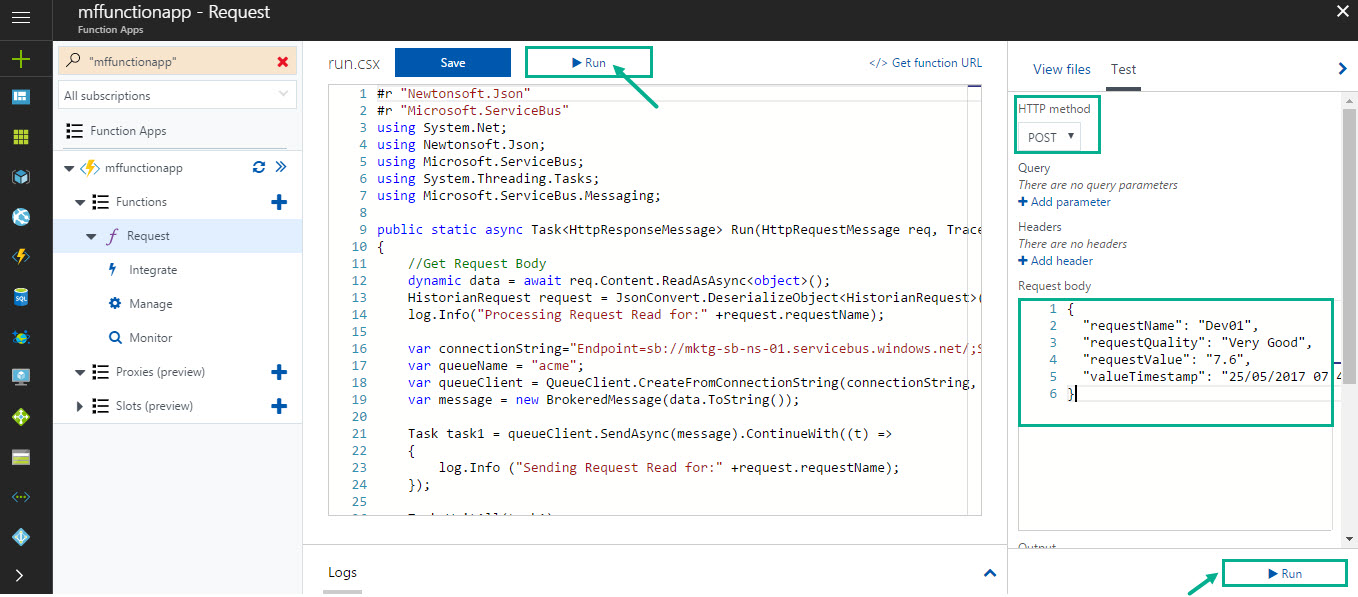
Test 1 – Trigger message from Function App to Service Bus
Let’s go to the Function App and send a request message. Enter the message in the Request Body, select the HTTP method as POST and click
Run. If the code executes properly, you will see a confirmation message as “
Request read Processed for: ..” with status code 201.

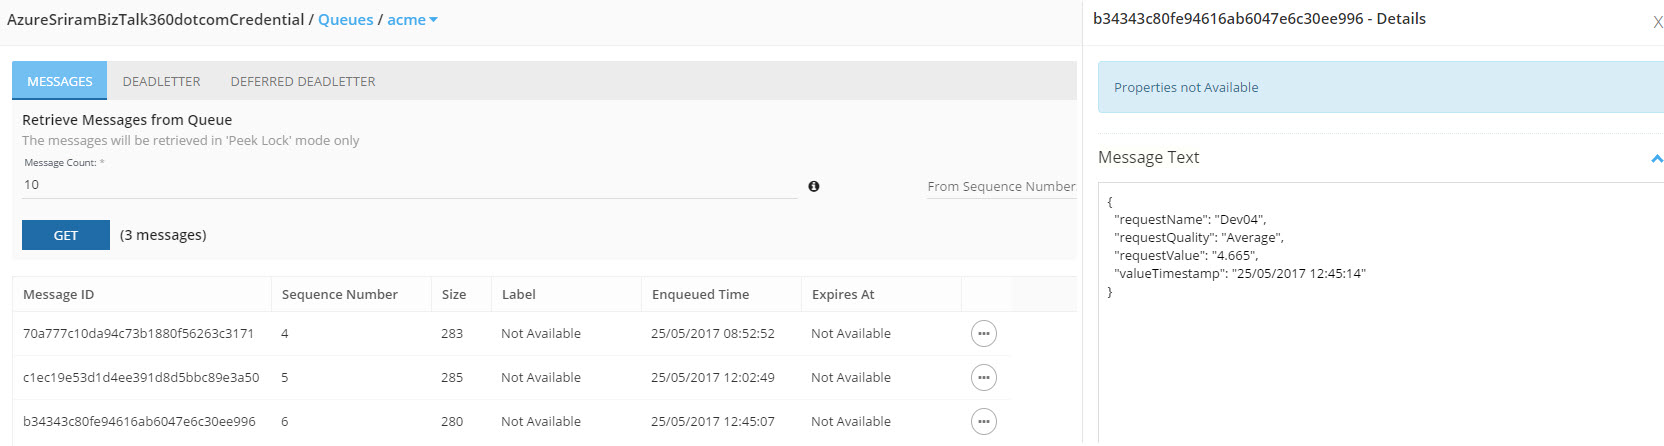
Now, let’s see if the message is available in ServiceBus360.
Test 2 – Swagger Editor in Azure Function App
Let’s go to the Azure Function App and open the Swagger Definition. In the Parameters section, we will define the required parameters and trigger the request message and then see if the message has been pushed into Azure Service Bus (through ServiceBus360).

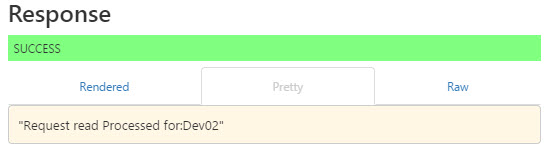
If the request was successful, you will see the response code as 201 with the message as “
Request read Processed for: …“.
Now, let’s see if the message is available in ServiceBus360.
Test 3 – Developer Portal
In this test, we will open the Developer Portal and select the product we created in Step 5 previously (
Request Function App). We will trigger the request from the Developer portal (API Management) and see if the request is available as a message in Azure Service Bus (using ServiceBus360).
- Open Developer Portal
- Select API’s and choose the API that we created (as a product) previously in Step 5 (Request Function App)
- You will see the API now available in the Developer Portal with the Try It button to trigger values
- Click Try It. In the Request Body section, since we gave a sample example when we created the Function App in API Management, you will see the same example. You can tweak the example to generate a request message.
- Click Send. If the message was sent successfully, you will see a 201 response code. Now, let’s see if the message is available in ServiceBus360.
Conclusion
The above tests show how you can take an Azure Function, decorate with Swagger Metadata and wire it up with API Management so that you can take advantage of other API Management features in order to protect your Azure Functions.
Feedback
You can give your feedback about Middleware Friday episodes, any special topic of interest, or any guest speaker whom you would like to see at Middleware Friday. Simply tweet at @MiddlewareFri or drop an email to
middlewarefriday@gmail.com.
You can watch the Middleware Friday sessions
here.
[adrotate banner=”8″]