Published on : Feb 13, 2017
Category : Events
This blog post covers the Episode 6 of Middleware Friday where Kent Weare talks on Azure Logic Apps and Power BI Real-Time Data Sets. This is very similar to the concept explained in
Episode 3 blog post with the only difference being that instead of saving the result in SQL Azure, we will be moving the data into Power BI for real-time data analysis.
Demo
Let’s get started with the demo! For the demo purposes, Kent takes the same example of an electronics store that we discussed earlier in
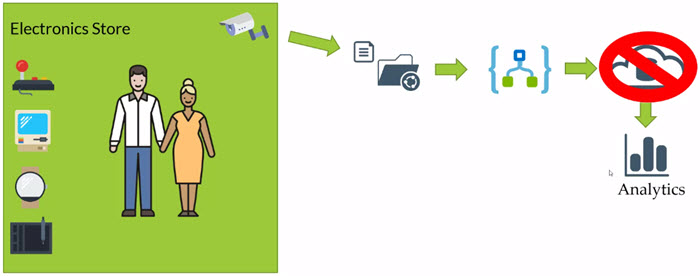
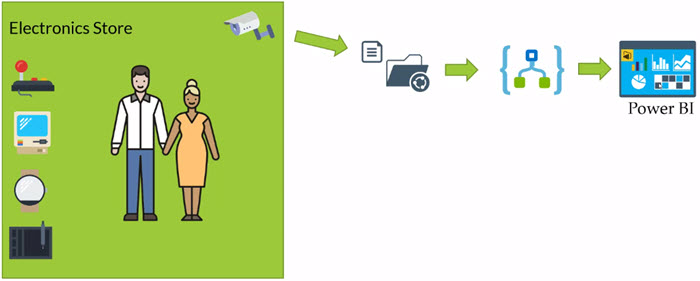
Episode 3 blog post. I’ll try to replicate the same scenario with my examples to give you a real time experience :-). A security CCTV camera captures the faces of the shoppers who come in to the store. The pictures are uploaded to OneDrive. A Logic App consumes these images from OneDrive and will further upload them to a Blob Storage. We will pass the blob URL to the Cognitive Services Face API and the Face API will return a series of attributes about the person in the picture (such as gender, age, beard, moustache, sunglasses, etc) that we will be passing into Power BI for real time data analysis.
Therefore, the scenario will now look like
Create a Power BI Account and create Streaming Data sets
Prerequisite: You need to create a Power BI Account before getting started with the demo
In order for us to store the results from the ‘Detect Faces’ action in the Logic App into Power BI, we need to first create a dataset to store this information. The dataset is nothing but the backend data structure to populate the Power BI connector with the meta data.
- Log in to your Power BI account
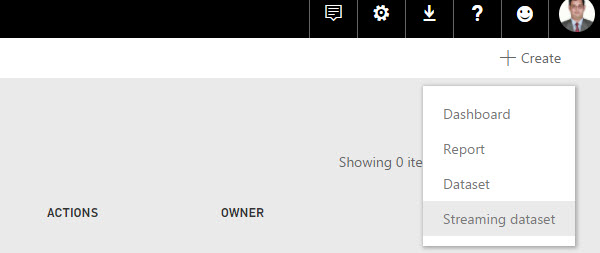
- In your workspace, Click ‘+Create‘ and select ‘Streaming Dataset‘ at the top right corner
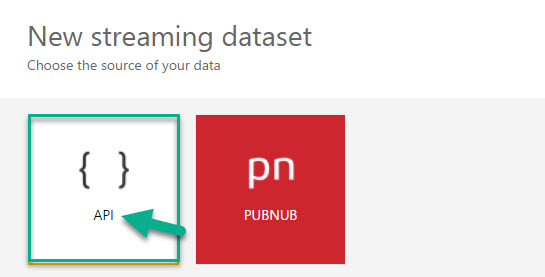
- Select data source as API. Click Next
- In the next step, you can define the Power BI table schema. You need to start off by providing a name for the dataset (say, Demographics). Next, we need to create the fields to store the different attributes that come back from the Face API (such as Gender, Age, Moustache, Beard, Sunglasses etc).
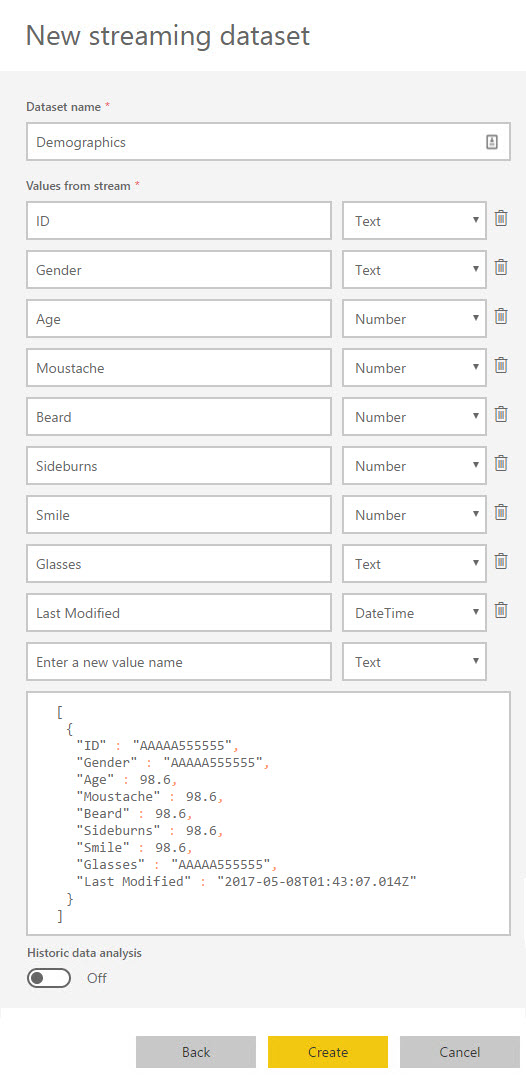
- Click Create to create the data set
- Next, you need to create (design) the Power BI dashboard that will reflect the values in the format of your choice.
Let’s create the Face API Logic App
All the steps will remain the same as we did in the
Episode 3 blog post. Therefore, I am going to quickly show the screenshots for each step in the Logic App.
- Trigger for the file drop on OneDrive
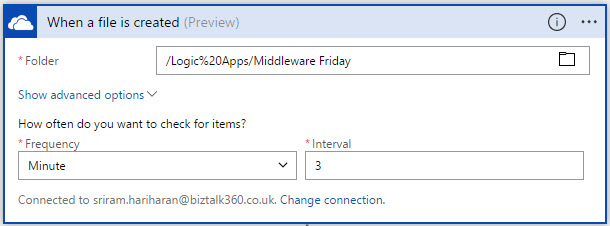
- Logic App Action where the files from OneDrive are uploaded on to the blob storage. If you do not have a blob storage, you need to first create an Azure Storage account. In the ‘Create Blob’ connector, first connect with your Storage account, and then provide the folder path, blob name, and blob content.

- Action to call the ‘Detect Faces (Preview)‘ API

- ‘For Each‘ action for the Face API operation that will report the demographics information about the person in the picture to the Demographics dataset in Power BI.
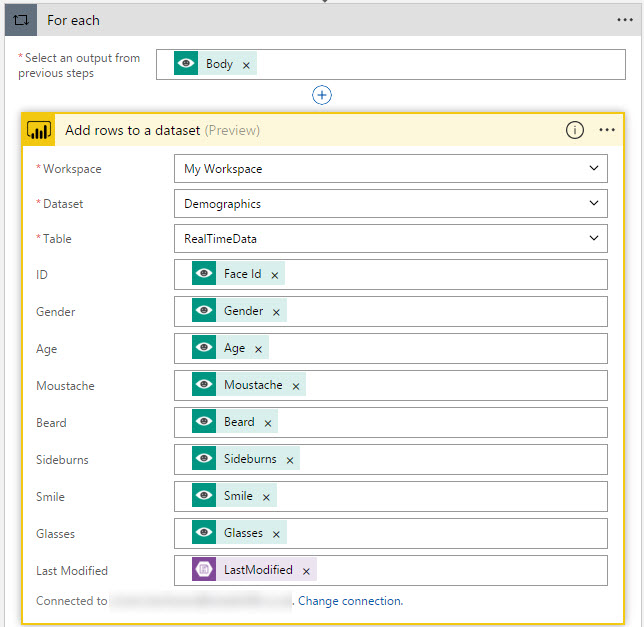
- Now it is time to run the Logic App and watch our Power BI Dashboard reflect the data in nice graphical view. Once again, as in my earlier Episode 3 blog post, I will show the real time execution of the Logic App in the below GIF file.
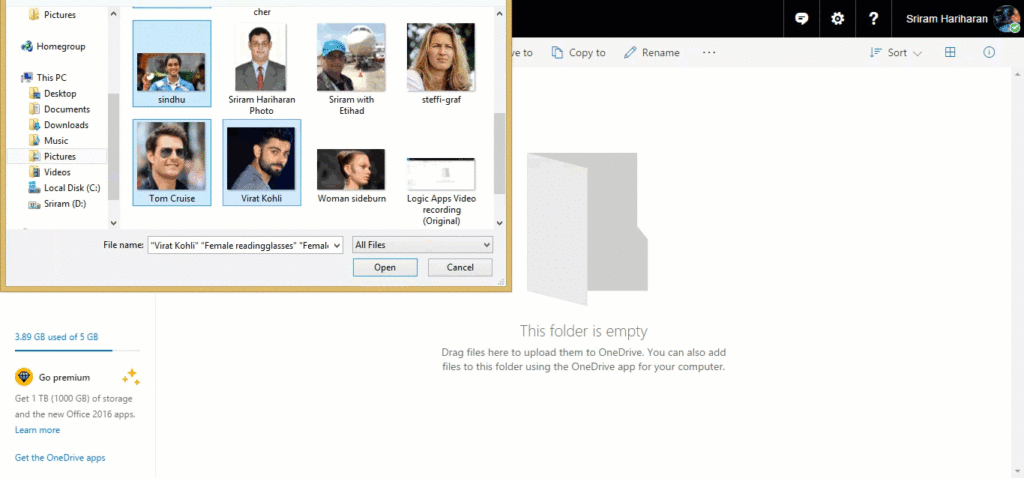
Therefore, we now get to understand the power of Power BI and how we can use it to portray the information that we retrieve from the Cognitive Services offering.
Towards the end of the session, Kent highlighted the effort of his good friend Sandro Pereira for releasing the Microsoft Integration Stencil Pack v2.4 for Visio 2016/2013. You can watch the video of this session on Azure Logic Apps and Cognitive Services here.
Feedback
You can give your feedback about Middleware Friday episodes, any special topic of interest, or any guest speaker whom you would like to see at Middleware Friday. Simply tweet at
@MiddlewareFri or drop an email to
middlewarefriday@gmail.com.
You can watch the Middleware Friday sessions
here.
[adrotate banner=”4″]


